
How to Auto-Tag Clothing Photos for a Store or Marketplace
Every clothing catalog has the same quiet problem: the photos arrive faster than anyone can describe them. A seller uploads forty pictures and types "nice outfit". A supplier sends a folder named new_final_2. Someone on your team then decides, by eye, that this one is a scarf, that one has a belt, and the third shows a bag that isn't for sale at all.
That work can be done by an API. This guide shows what automatic tagging of clothing photos gives you, how to turn the result into something a catalog can use, and where it stops being useful.
What you get back from one photo
The Fashion API takes a photo and returns every piece of clothing and every accessory it finds. For each item you get three things:
a class name, such as scarf, shirt, trousers or bag;
a confidence score between 0 and 1;
a bounding box, so you know where in the photo the item is.
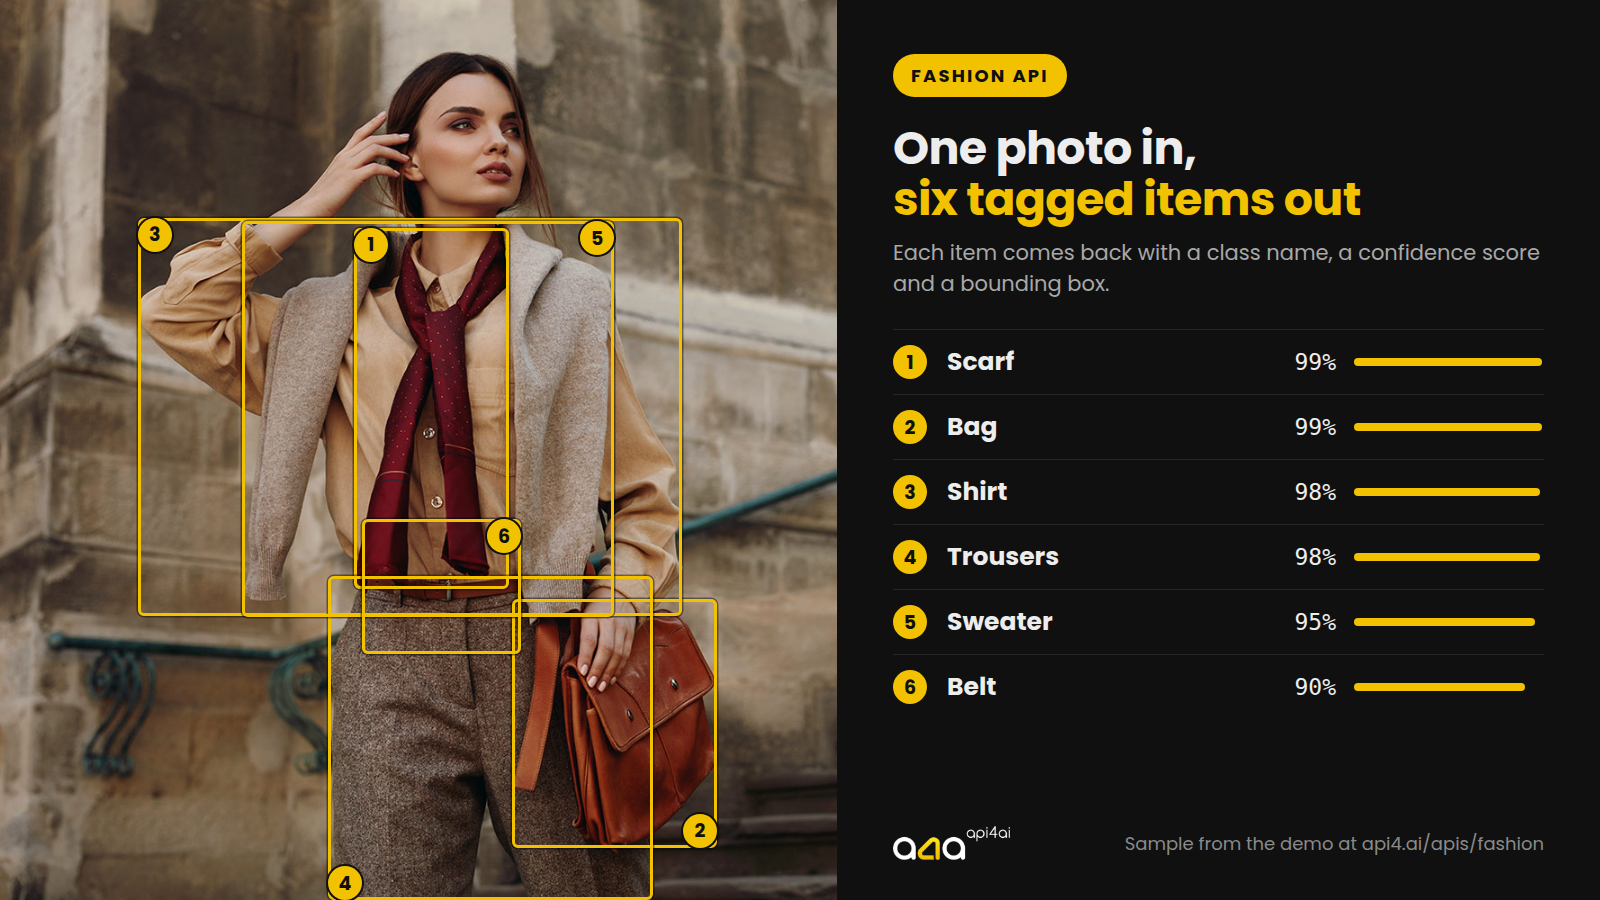
That is the sample from the live demo: one photo, six items, each with its own score. The other demo photos return classes such as skirt, top, coat, jeans, hat, sunglasses and shoes.
Be clear about what this is. The API tells you what kind of item is in the photo and where. It does not return color, material, pattern, size or brand. If you need those, they come from your product data or from another step.
Three jobs it does well
1. Tagging a catalog
The most common use. Run every product photo through the API once and store the item types against the product. From then on the shop can offer a "scarves" filter without anyone having typed the word.
It matters most where the seller isn't you: marketplaces, resale platforms, rental services. Listings there arrive with whatever the seller felt like writing, and the photo is often the only reliable description. (The same photos usually need a clean background too; see Scaling product catalog onboarding with automated background removal.)
Outfit photos are where this pays off twice. A model wearing a shirt, a sweater and a belt gives you three tags from one image. That is also a warning: only one of those may be the product for sale. Use the bounding boxes to decide. The item that fills most of the frame, or sits in the middle of it, is usually the one being sold; the rest are styling.
2. Stocktaking
Photograph the rail, the shelf or the returns bin and count what comes back by class. It won't replace a barcode scan for exact stock, but it answers "roughly how many coats came back this week" from pictures you may already be taking.
3. Preparing photos for visual search
"Find me something like this" works much better on a crop of the item than on the whole photo with a street behind it. The boxes are normalized [x, y, width, height] values between 0 and 1, so multiplying by the image size gives you pixels, and each detected item can be cut out and indexed on its own.
From tags to catalog fields
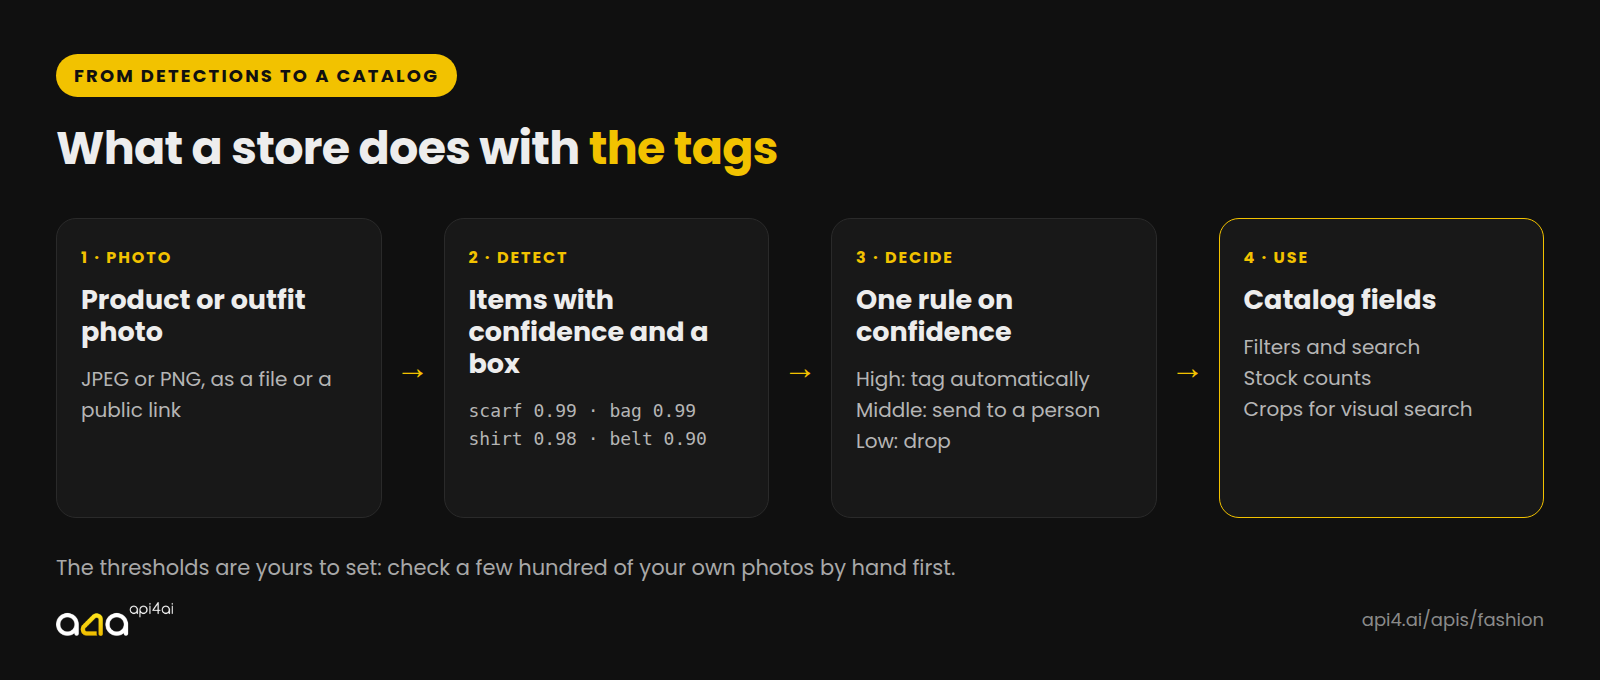
A list of detections isn't a catalog yet. The step in between is one rule about confidence:
High confidence: write the tag automatically.
Middle: send the photo to a person, with the suggested tag already filled in.
Low: ignore it.
Where "high" starts is your decision, and it depends on your photos. Flat-lay shots on white behave differently from crowded street photos. Before you pick the numbers, run a few hundred of your own images and check the results by hand. An hour of that tells you more than any benchmark.
Two practical details save trouble later:
Keep the raw response. Store the classes, scores and boxes as they came back, not only the tags you derived. When you change the threshold, you won't have to pay to process the photos again.
Map class names to your own categories once. The API says "trousers"; your shop may say "pants". A small lookup table in your code keeps the two apart.
What it looks like in code
One request per photo, as a file or as a public link:
curl -X POST "https://api4ai.cloud/fashion/v2/results" \
     -H "X-API-KEY: $YOUR_API_KEY" \
     -F "url=https://static.api4.ai/samples/fashion-1.jpg"
The response lists the detected objects, each with its box and its classes:
{
  "box": [0.2627, 0.0462, 0.6867, 0.6496],
  "entities": [
    { "kind": "classes", "name": "classes",
      "classes": { "scarf": 0.6910 } }
  ]
}
Photos must be JPEG or PNG and under 16 MB. One thing to build in from the start: a photo the service can't read still comes back as HTTP 200, with status.code set to "failure" and the reason in status.message. Check that field for every image, or broken files will quietly drop out of your catalog. The full reference is in the Fashion API docs.
A step-by-step Python version, which tags a whole folder and writes a CSV, follows tomorrow.
Where it doesn't help
Attributes. No color, fabric, pattern, fit or size. Item type and position only.
Brands. It doesn't read labels or logos. That is a job for the Brand Recognition API.
Things that aren't clothes. It's trained on common types of apparel and accessories. Unusual garments may come back under a broader class, or not at all.
Deciding what is for sale. In an outfit photo it finds everything. Choosing the product is your rule, not the model's.
Crowded or tiny items. A belt half-hidden under a sweater, or shoes at the edge of a wide shot, will score lower. That is what the middle band and the human check are for.
What it costs
On the API4AI developer portal the Fashion API is pay-as-you-go at a list price of $300 per 1,000 requests, with no subscription. That is the price for small and occasional use.
For a catalog of any size, ask for a quote instead. The price depends on how many images you process, their resolution and how many items a typical photo contains, and at volume the discount is significant. Write to hello@api4.ai with a rough monthly number and a few sample photos.
Try it on your own photo first
The demo on the Fashion API page takes your own JPEG or PNG and shows the detected items with their scores and boxes, without an account. If the results look right on your kind of photo, an API key on the portal takes a minute and needs no credit card.